10 Smart Home Decor Upgrades That Look Multi-Million Dollar
You don’t need a celebrity decorator or an unlimited budget to make your home look like it belongs in Architectural Digest. The truth? Luxury is in the details. From the molding that crowns your walls to the hardware on your cabinets, strategic upgrades can transform ordinary rooms into spaces that whisper (or shout) sophistication. We’re talking about those architectural touches that make guests stop mid-sentence and ask, “Wait, did you hire a designer?”
These aren’t your typical throw-pillow swaps. These are the foundational changes that real estate agents call “value-adds” and interior designers consider non-negotiables for high-end homes. The best part? Many of these upgrades are more accessible than you think, delivering that bespoke, custom-built aesthetic without the custom-built price tag. Ready to elevate your space from nice to “how much did this house cost?” Let’s dive into the details that separate million-dollar homes from everyone else.
Architectural Crown Molding: The Secret Weapon of Luxury Estates
Crown molding is the finishing touch that luxury homes never skip. It’s the architectural equivalent of a tailored suit—subtle, refined, and unmistakably expensive-looking. The key is layering. Premium flexible crown molding creates that seamless transition between walls and ceilings, adding depth and dimension that flat surfaces simply can’t achieve. When you install molding with multiple profiles, you’re essentially creating shadow lines that catch light throughout the day, making rooms feel taller and more architecturally significant.
The secret that professional designers know? It’s all about scale and proportion. Large rooms demand substantial molding profiles, while smaller spaces benefit from more delicate treatments. Decorative corner blocks add an extra layer of sophistication, turning simple 90-degree angles into focal points that showcase craftsmanship. For rooms with lower ceilings, a lighter profile with LED lighting channels built into the molding creates an upward glow that visually lifts the ceiling plane—a trick used in luxury hotels worldwide.
Installation is more approachable than you’d think. Modern flexible molding materials bend around curves and arches, meaning you can achieve custom looks without custom carpentry bills. The transformation is immediate: rooms go from builder-grade basic to architect-designed in an afternoon. Paint it in a contrasting color for drama, or match it to your walls for subtle elegance—either way, it’s the detail that makes people assume your home cost far more than it did.
Pro Tip: The Lighting Integration Advantage
For next-level luxury, install LED strip lighting in a recessed channel behind your crown molding. This creates an ambient uplighting effect that makes ceilings appear to float—a technique used in five-star hotels and high-end residential projects. The soft glow adds warmth while showcasing your molding’s profile, especially stunning in evening hours.
Statement Lighting Fixtures That Command Attention
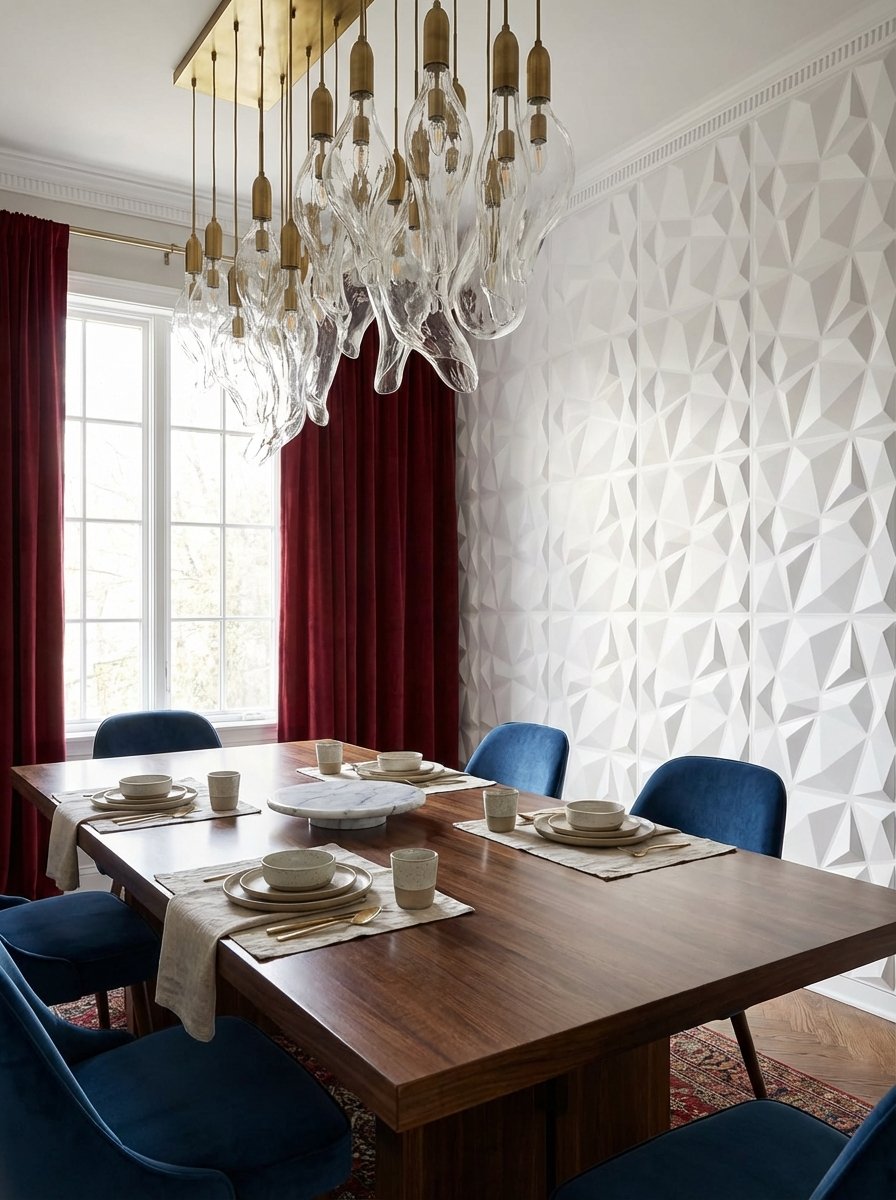
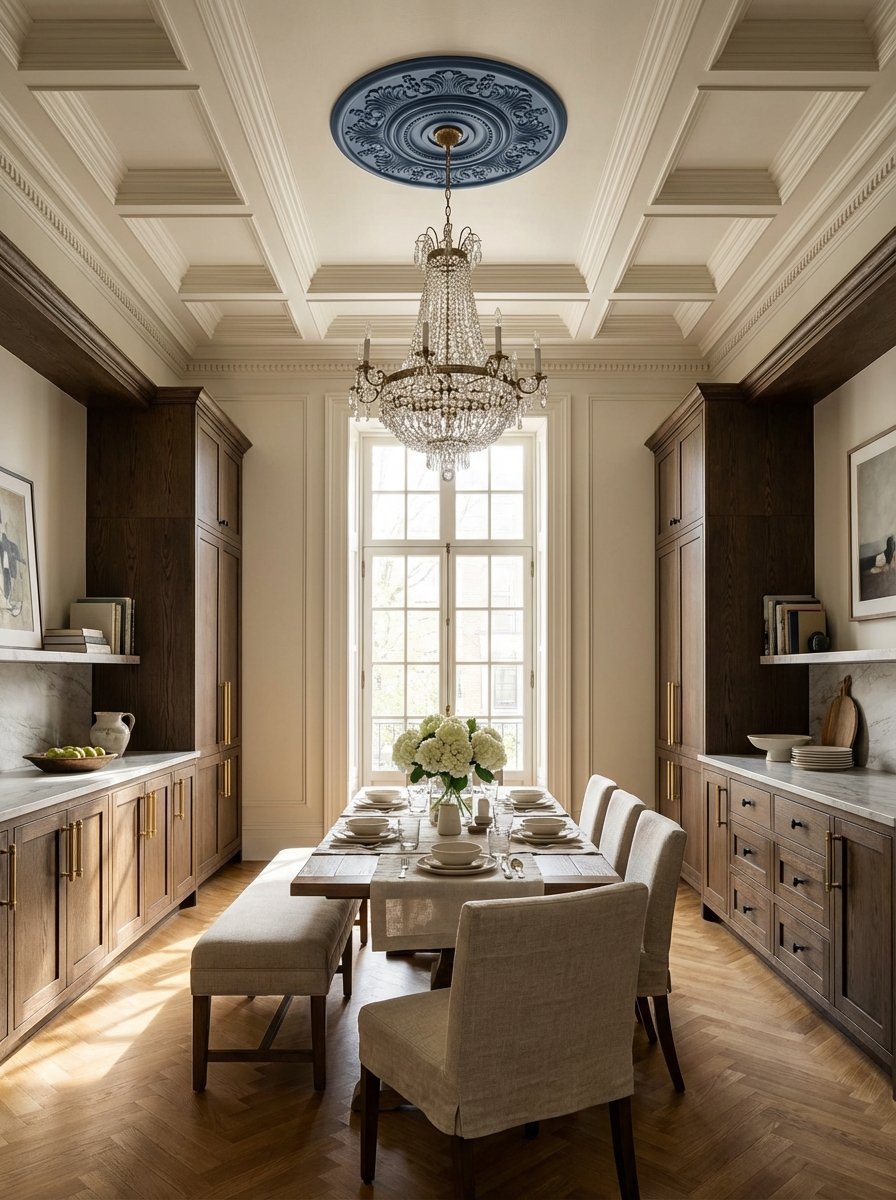
Lighting fixtures are the jewelry of interior design—they set the tone, define the style, and become instant conversation starters. In luxury homes, lighting isn’t an afterthought; it’s a carefully curated collection of sculptural pieces that function as art. A modern geometric chandelier transforms a dining room from mundane to magazine-worthy, creating vertical interest and casting beautiful shadow patterns across walls and ceilings. The interplay of light and form becomes a dynamic element that changes throughout the day.
The psychology of luxury lighting is fascinating: oversized fixtures create intimacy by drawing the eye upward and defining zones within open spaces. Industrial-style pendant clusters bring that loft-living aesthetic to kitchens and breakfast nooks, mixing raw materials with refined finishes. For bedrooms and living areas, statement floor lamps with marble bases provide task lighting while serving as sculptural elements that anchor seating arrangements. The key is scale—don’t shy away from pieces that feel slightly oversized; that boldness reads as confidence and design sophistication.
Professional designers follow the “rule of thirds”: allocate a third of your lighting budget to one show-stopping fixture, then layer in ambient and task lighting around it. This creates hierarchy and visual interest. Dimmer switches are non-negotiable—they allow you to adjust the mood from bright and energizing to soft and intimate. The right lighting fixture doesn’t just illuminate a room; it transforms the entire atmosphere, making spaces feel curated rather than decorated.
Pro Tip: The Height Calculation Formula
For dining room chandeliers, measure your table length and width in inches, add those numbers together, and convert to centimeters for the ideal fixture diameter. Hang it 30-36 inches above the table surface. This formula, used by professional lighting designers, ensures perfect proportions that photograph beautifully and function flawlessly.
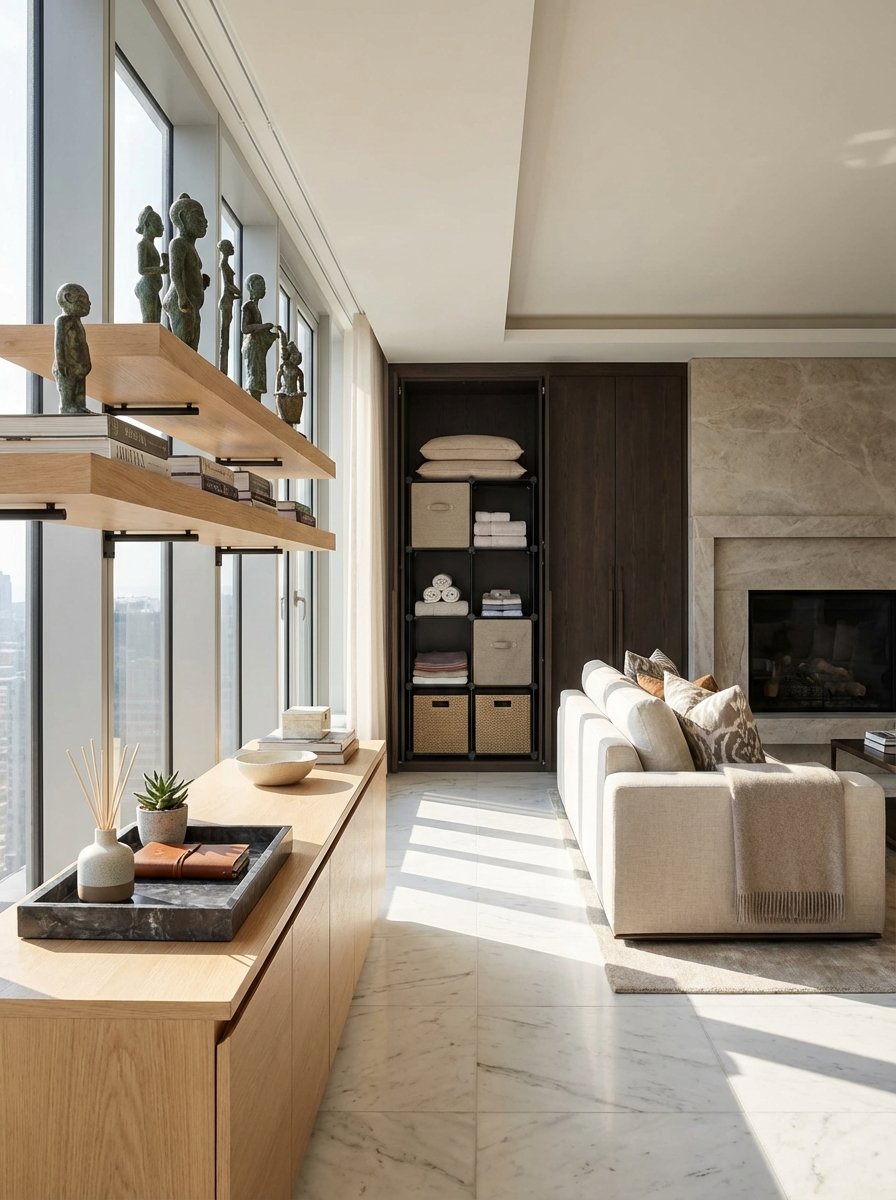
Custom Built-Ins That Scream Bespoke Craftsmanship

Nothing says “custom home” quite like built-in storage that looks like it was designed specifically for your space—because it should be. The beauty of modern modular systems is that you can achieve that bespoke look without hiring a master carpenter. Adjustable shelving units with crown molding toppers can be configured to fit any wall dimension, creating the illusion of permanent millwork. When painted the same color as your walls, they visually recede, making the contents the star while adding architectural substance.
The luxury difference lies in the details: integrated lighting, consistent spacing, and thoughtful styling. Floating console tables with hidden storage work beautifully in entryways and living rooms, providing display surfaces that don’t sacrifice function. For home offices and media rooms, wall-mounted cabinet systems hide clutter while creating clean, horizontal lines that make spaces feel larger and more organized. The key is making them look intentional—built-ins should feel like they’ve always been part of the architecture.
Styling is where custom built-ins truly shine. Follow the designer approach: group objects in odd numbers, vary heights, leave breathing room, and incorporate both decorative and functional pieces. Add interior backing in a contrasting color or texture—grasscloth, mirror, or a bold paint shade—to create depth. LED strip lighting along shelves highlights your favorite objects and adds ambiance. The goal is to create a curated display that looks effortlessly collected over time, even if you styled it last weekend.
Pro Tip: The 1/3 Rule for Shelf Styling
Professional stylists use the “rule of thirds”: one-third of shelf space should be books or vertical elements, one-third decorative objects, and one-third negative space. This proportion creates visual breathing room that prevents built-ins from looking cluttered or overwhelming, maintaining that high-end, gallery-like aesthetic.
Marble and Stone Accents for That Penthouse Feel
There’s something inherently luxurious about natural stone—its weight, its texture, its organic variations that can never be exactly replicated. In high-end interiors, stone isn’t relegated to just countertops; it’s a design element woven throughout the space. Marble serving trays and decorative accessories bring that five-star hotel aesthetic to coffee tables and nightstands, elevating everyday objects into design statements. The cool smoothness and veining patterns add visual interest and tactile luxury to any surface they grace.
The power of stone extends beyond decoration into functional art. Natural stone bookends and desk accessories anchor home offices with sculptural weight, while their organic forms soften the hard lines of technology and furniture. For kitchens and baths, marble cutting boards and vanity organizers merge practicality with beauty—these aren’t items you hide away; they’re permanent installations that contribute to the room’s aesthetic. Each piece of natural stone is unique, which means your home displays materials that literally cannot be duplicated.
Mixing stone types creates depth and prevents spaces from feeling too matched or showroom-perfect. Pair cool-toned marble with warm travertine, or contrast smooth polished surfaces with rough-hewn edges. The variation in color, veining, and finish adds layers of visual interest that synthetic materials simply cannot achieve. Professional designers use stone as “jewelry moments”—strategic placements that catch the eye and elevate the perceived value of the entire room.
Pro Tip: The Temperature Trick for Authenticity
Real stone stays cool to the touch, even in warm rooms—it’s a subconscious signal of luxury and authenticity. Place marble accessories in high-traffic areas where guests might touch them. That subtle temperature difference registers as quality and permanence, enhancing the overall perception of your home’s value and sophistication.
High-End Hardware Swaps That Transform Every Room
If crown molding is a tailored suit, hardware is the cufflinks—small details that signal intentionality and taste. Upgrading cabinet pulls, drawer handles, and door knobs is the fastest way to elevate a space from builder-grade to custom-designed. Brushed brass cabinet pulls with geometric designs bring that contemporary luxury feel to kitchens and bathrooms, their warm metallic finish catching light and adding subtle glamour to everyday interactions. The weight and finish of quality hardware telegraphs value every time you open a door or drawer.
The secret to cohesive luxury is consistency with personality. Choose one or two finish families—perhaps matte black lever handles for doors and oil-rubbed bronze knobs for cabinetry—and repeat them throughout connected spaces. This creates visual flow while allowing for subtle variation that prevents monotony. In luxury homes, hardware isn’t matchy-matchy; it’s coordinated. Mixing finishes intentionally (warm brass with cool nickel, for example) adds sophistication and prevents spaces from feeling too themed or rigid.
Installation is remarkably simple—usually just a screwdriver and fifteen minutes per piece—but the impact is transformative. Suddenly, your basic IKEA kitchen looks custom. Your bathroom vanity reads as designer. The tactile experience of solid, well-weighted hardware subconsciously registers as quality and permanence. Don’t underestimate the power of these small touchpoints; in aggregate, they completely shift the perceived value of your space.
Pro Tip: The Ergonomic Luxury Standard
Professional designers specify hardware that’s slightly oversized—4-inch pulls instead of 3-inch, for example. The larger scale not only looks more substantial and expensive, but it’s also more ergonomic and easier to grip. This is why high-end homes feel better to live in, not just look at—every detail is optimized for both beauty and function.
Coffered Ceilings: The Architectural Detail That Changes Everything
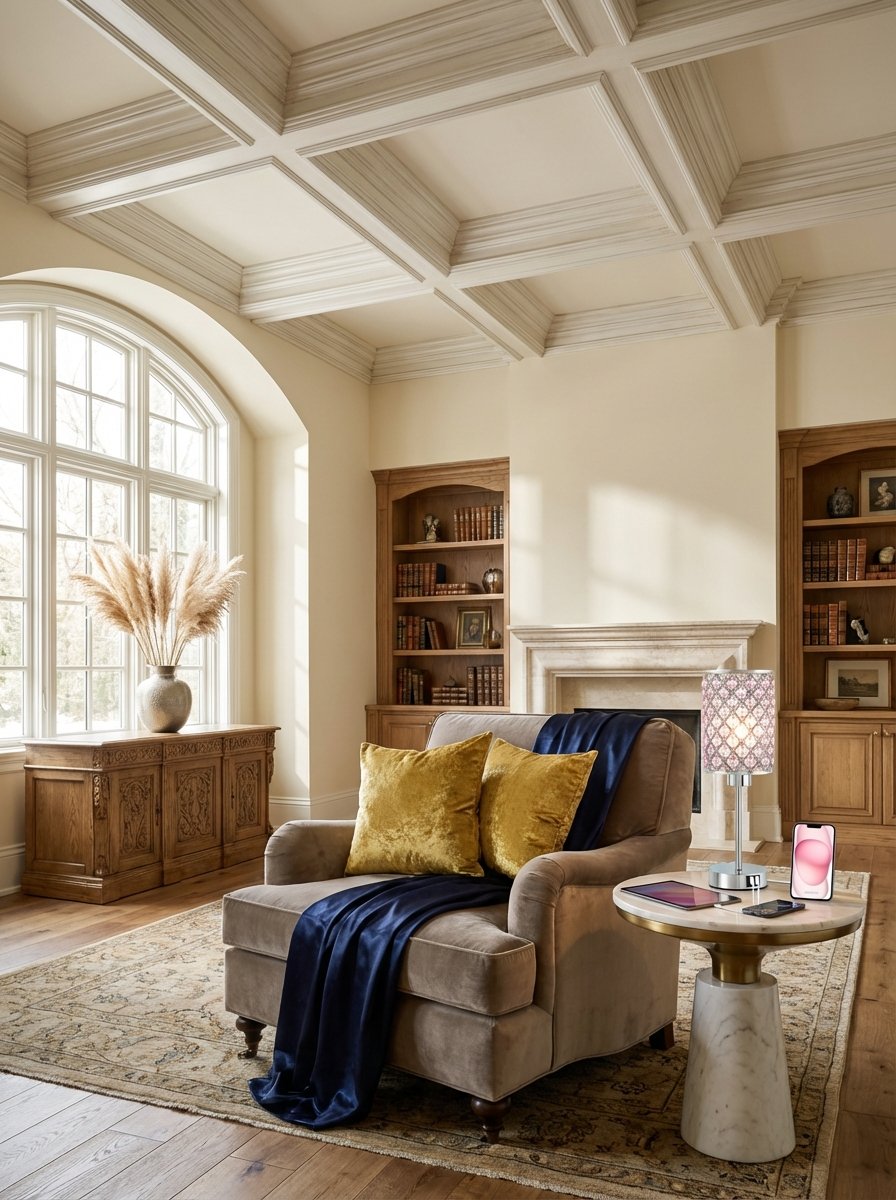
When you walk into a luxury home and can’t quite identify why it feels so elevated, look up—chances are, it’s the ceiling. Coffered ceilings add three-dimensional depth and architectural gravitas that flat ceilings simply cannot match. Easy-to-install ceiling beam systems create that recessed-panel look without major construction, transforming boring fifth walls into geometric focal points. The interplay of light and shadow across the recessed sections adds constant visual interest, making rooms feel taller and more substantial.
The beauty of modern coffered ceiling systems is their flexibility. You can go traditional with classical crown molding profiles for a European estate feel, or contemporary with clean, minimal lines using modern trim alternatives for a sleek urban aesthetic. The grid pattern you choose affects the entire room’s proportion—larger squares feel grand and formal, while smaller rectangles create coziness and intimacy. Paint the recessed sections a shade or two darker than the beams for subtle sophistication, or go bold with contrasting colors for dramatic impact.
Installation is surprisingly accessible for DIYers with basic carpentry skills. Modern lightweight materials adhere directly to existing ceilings, eliminating the need for structural changes. The key is precise measurement and spacing—professional installers follow mathematical formulas to ensure symmetry and proportion. Once installed, coffered ceilings become permanent architectural features that increase both the perceived and actual value of your home. Real estate agents consistently cite distinctive ceiling treatments as selling points that justify premium pricing.
Pro Tip: The Lighting Integration Secret
Install recessed lighting within each coffered section for even, shadow-free illumination that highlights the architectural detail. Use LED fixtures on dimmer switches to adjust ambiance from bright task lighting to soft, romantic glow. This technique, standard in luxury hotels and upscale restaurants, ensures your coffered ceiling looks stunning at any time of day.
Designer Window Treatments That Frame Your Views Like Art
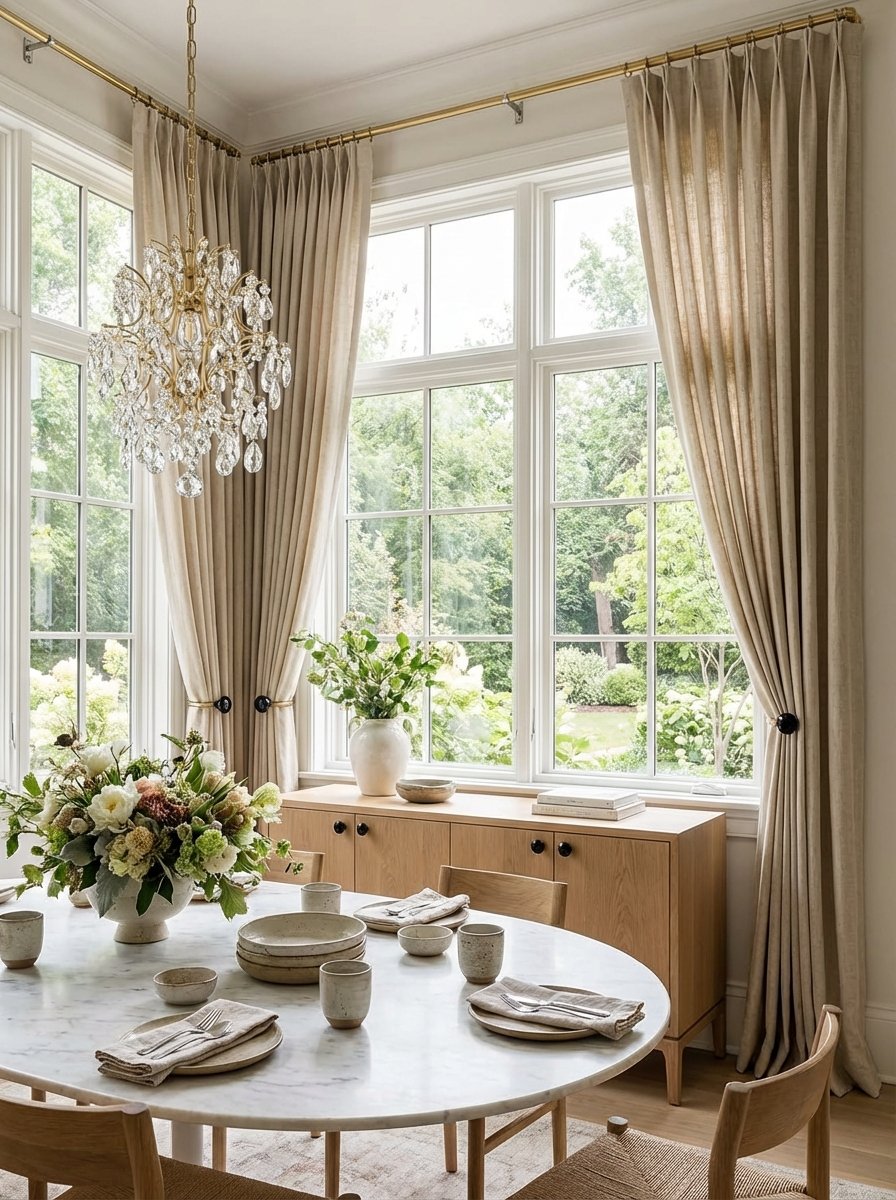
Windows are your home’s connection to the outside world, and how you dress them signals either design sophistication or afterthought. The luxury standard? Floor-to-ceiling treatments that make windows appear larger and more architectural than they actually are. Custom-look curtain panels in premium fabrics should skim the floor (or puddle elegantly for extra drama), hung from hardware mounted as close to the ceiling as possible. This vertical emphasis draws the eye upward and makes rooms feel taller and more expansive.
Layering is the professional secret to designer-worthy windows. Combine blackout roller shades for functionality with flowing drapery for beauty. The shades provide privacy and light control, while the curtains add softness, texture, and color. Statement curtain rods in architectural finishes become sculptural elements themselves—think oversized diameter, decorative finials, and premium materials like brass or wrought iron. The hardware should be substantial enough to support the visual weight of the fabric and styled enough to stand out as a design element.
Fabric choice makes or breaks the look. In luxury interiors, window treatments use quality materials with body and drape—linens, silks, velvets, or high-end synthetics that mimic natural fibers. Avoid anything that looks flat or plasticky. The fullness ratio matters too: panels should be at least twice the width of the window (preferably three times) to create those beautiful, gathered folds when drawn. Proper puddling or breaking at the floor adds a custom, “installed-by-a-designer” finish that ready-made curtains rarely achieve.
Pro Tip: The Ceiling-Mount Width Trick
Mount curtain rods 4-6 inches wider than the window frame on each side, and as close to the ceiling as possible (even if the window is much lower). This creates the illusion that your windows are both taller and wider, a technique interior designers call “architectural enhancement.” The visual expansion makes rooms feel more luxurious and proportionally balanced.
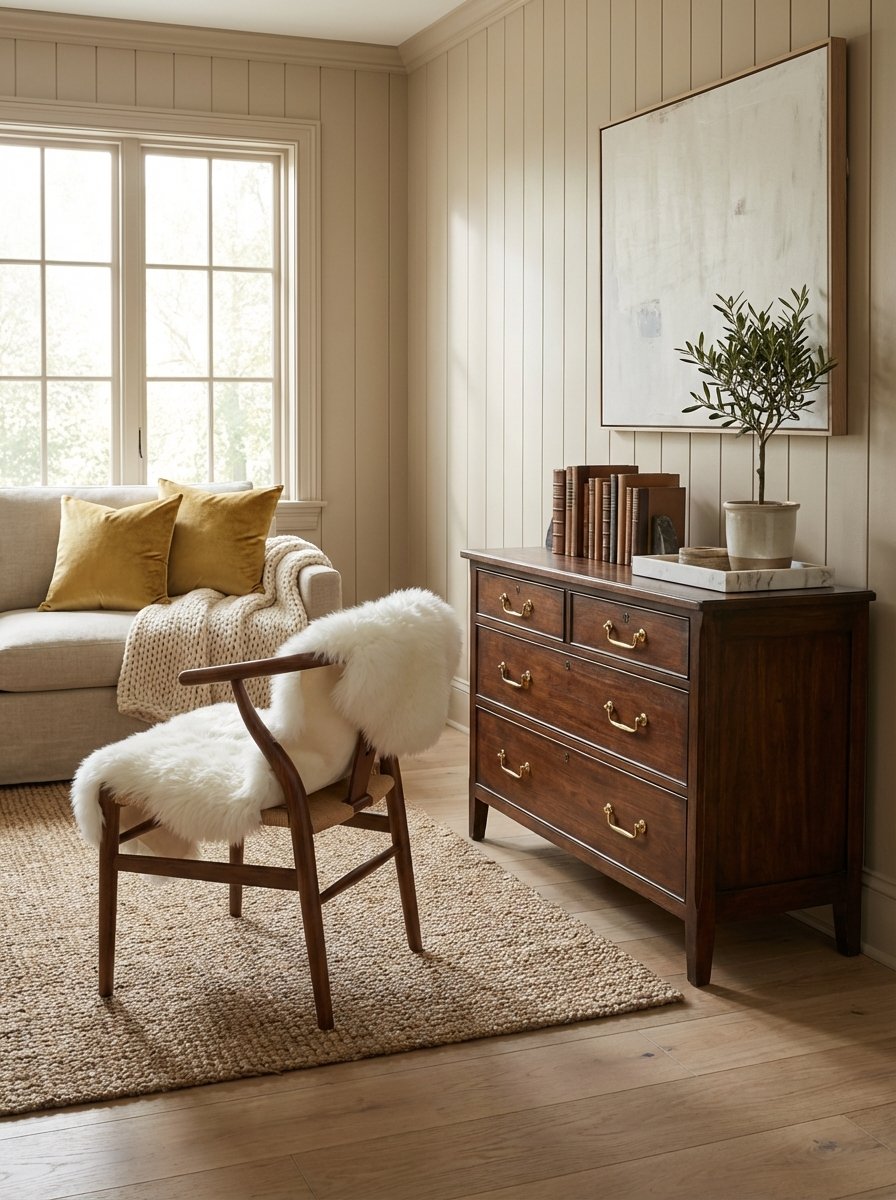
Textured Wall Treatments Beyond Basic Paint
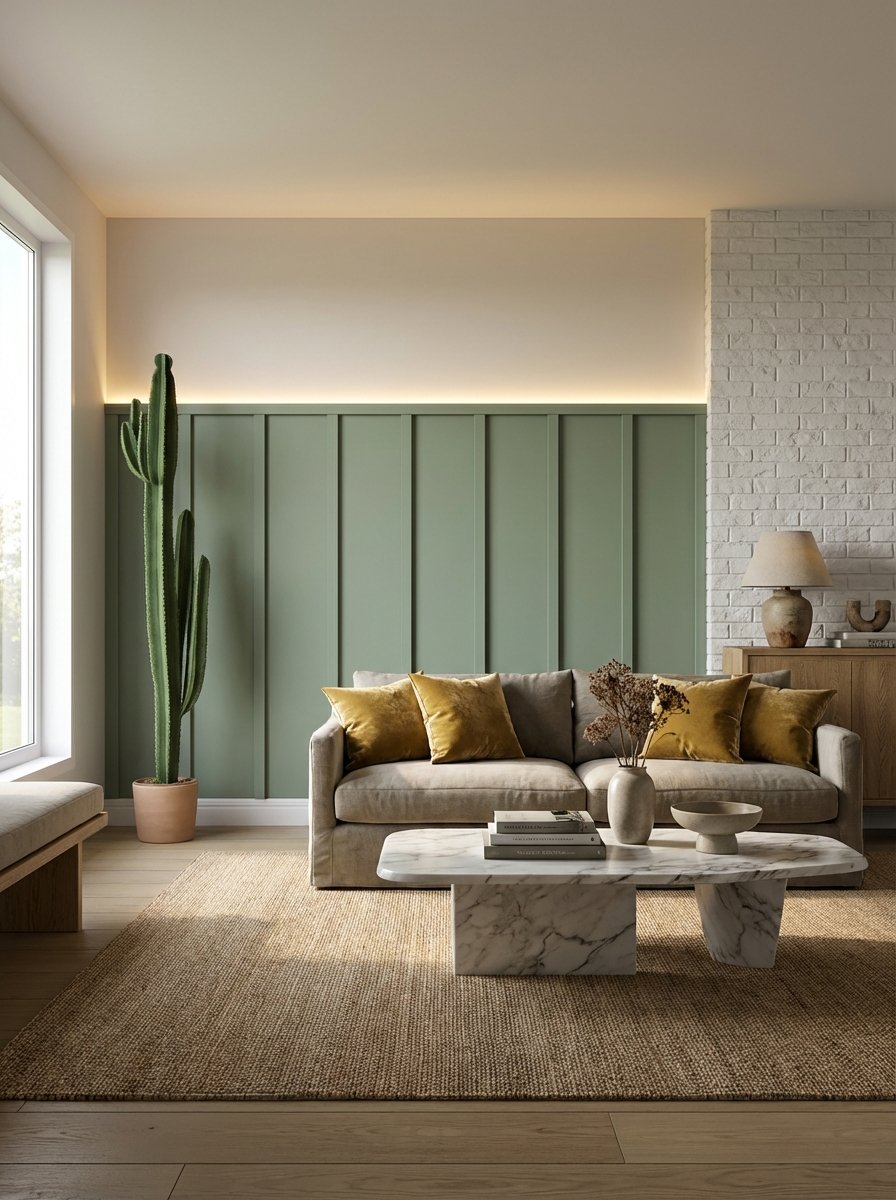
Flat painted walls are fine, but textured surfaces add depth and sophistication that paint alone cannot achieve. In high-end interiors, walls become tactile experiences—surfaces you want to touch, that change appearance as light shifts throughout the day. Three-dimensional peel-and-stick wall panels create dramatic accent walls with geometric patterns that cast beautiful shadows, adding architectural interest without permanent commitment. The dimensional quality makes walls feel custom-designed rather than builder-basic.
Natural textures bring organic warmth and visual richness to spaces. Grasscloth wallpaper in neutral tones introduces subtle texture and horizontal lines that make rooms feel wider and more sophisticated. The natural fiber variations ensure no two installations look identical—instant uniqueness. For bolder statements, faux brick and stone wall treatments add industrial-chic or rustic elegance, depending on style and placement. These materials work particularly well as accent walls behind beds, sofas, or dining tables, creating focal points that anchor furniture arrangements.
The luxury approach to textured walls is restraint: one feature wall per room, maximum. Too much texture overwhelms; strategic placement creates impact. Consider sight lines—accent walls should be visible from the room’s entrance, making an immediate impression. Lighting is crucial; graze textured surfaces with wall-washers or picture lights to emphasize dimensionality. The interplay of light and shadow across textured surfaces adds constant visual interest, making rooms feel dynamic rather than static.
Pro Tip: The Lighting Angle Formula
To maximize the impact of textured walls, position lighting at a 30-45 degree angle from the surface. This grazing light emphasizes shadows and dimensionality, making textures appear more pronounced and dramatic. Avoid direct perpendicular lighting, which flattens texture and defeats the purpose of the dimensional surface.
Strategic Mirror Placement for Gallery-Worthy Spaces
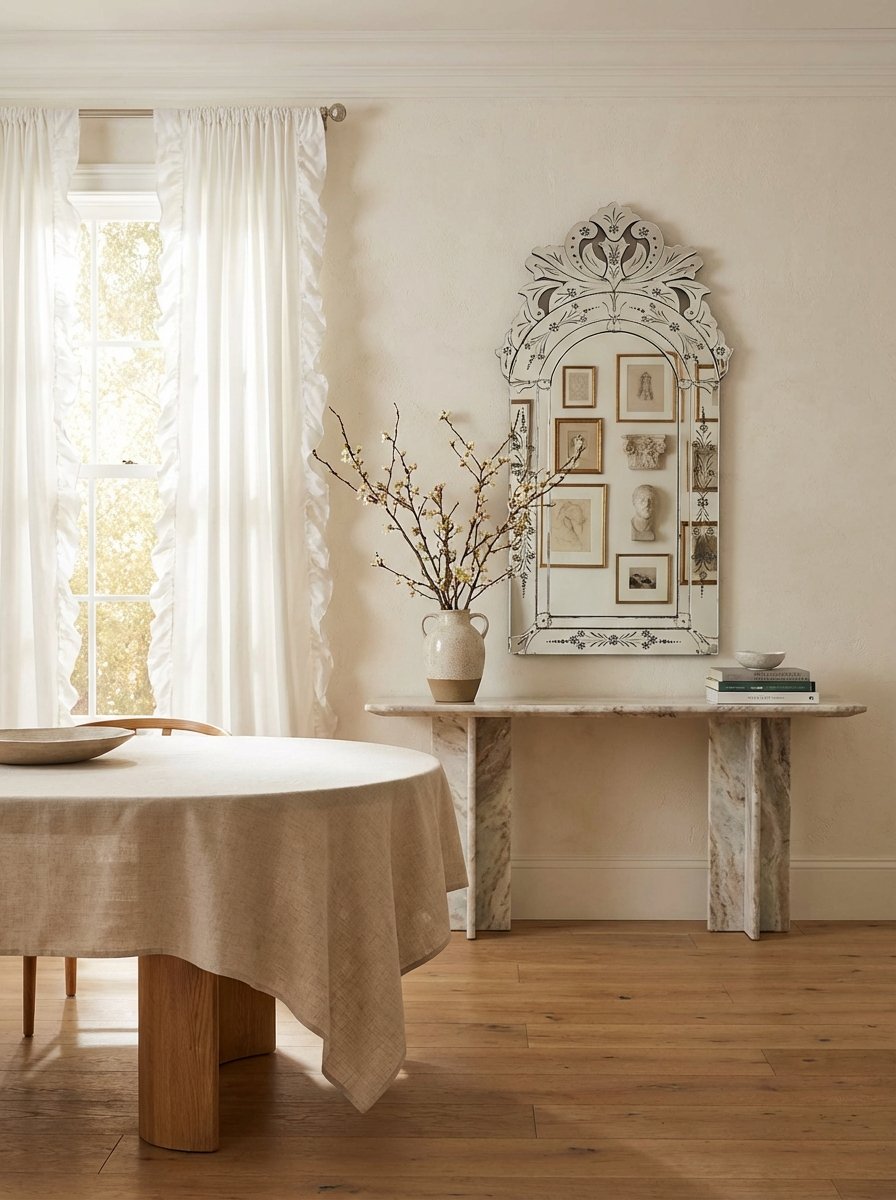
Mirrors are the ultimate design multitaskers: they amplify light, create the illusion of space, and serve as sculptural art pieces. In luxury interiors, mirrors aren’t afterthoughts hung at arbitrary heights—they’re strategically placed to maximize impact and functionality. Full-length arched mirrors with architectural frames lean elegantly against walls, adding vertical drama while checking your outfit before heading out. The curved top softens hard architectural lines and references classical design without feeling dated.
Oversized mirrors create instant glamour and spatial expansion. Large rectangular mirrors with beveled edges positioned opposite windows bounce natural light deep into rooms, making spaces feel twice as bright and significantly larger. The key is scale—small mirrors look tentative and cheap; substantial mirrors make bold statements that read as intentional design choices. For maximum impact, size your mirror to at least two-thirds the width of the furniture it’s above, whether that’s a console, sofa, or dresser.
Frame selection transforms mirrors from functional to fabulous. Decorative mirrors with metallic or antiqued frames function as wall art, their reflective surfaces adding an interactive element that static art cannot provide. Group multiple mirrors of varying sizes and shapes for a gallery wall with depth and dimension. The professional trick? Arrange mirrors to reflect something beautiful—a light fixture, a window view, or an architectural detail—rather than random clutter or blank walls.
Pro Tip: The Double-Light Reflection Rule
Position mirrors to reflect both natural and artificial light sources for maximum luminosity. A mirror placed opposite a window captures daylight; one near a lamp or chandelier multiplies artificial light. This double-reflection technique, standard in luxury hotel design, makes rooms feel perpetually well-lit and spacious, enhancing mood and perceived square footage.
Curated Art Walls That Rival Private Collections
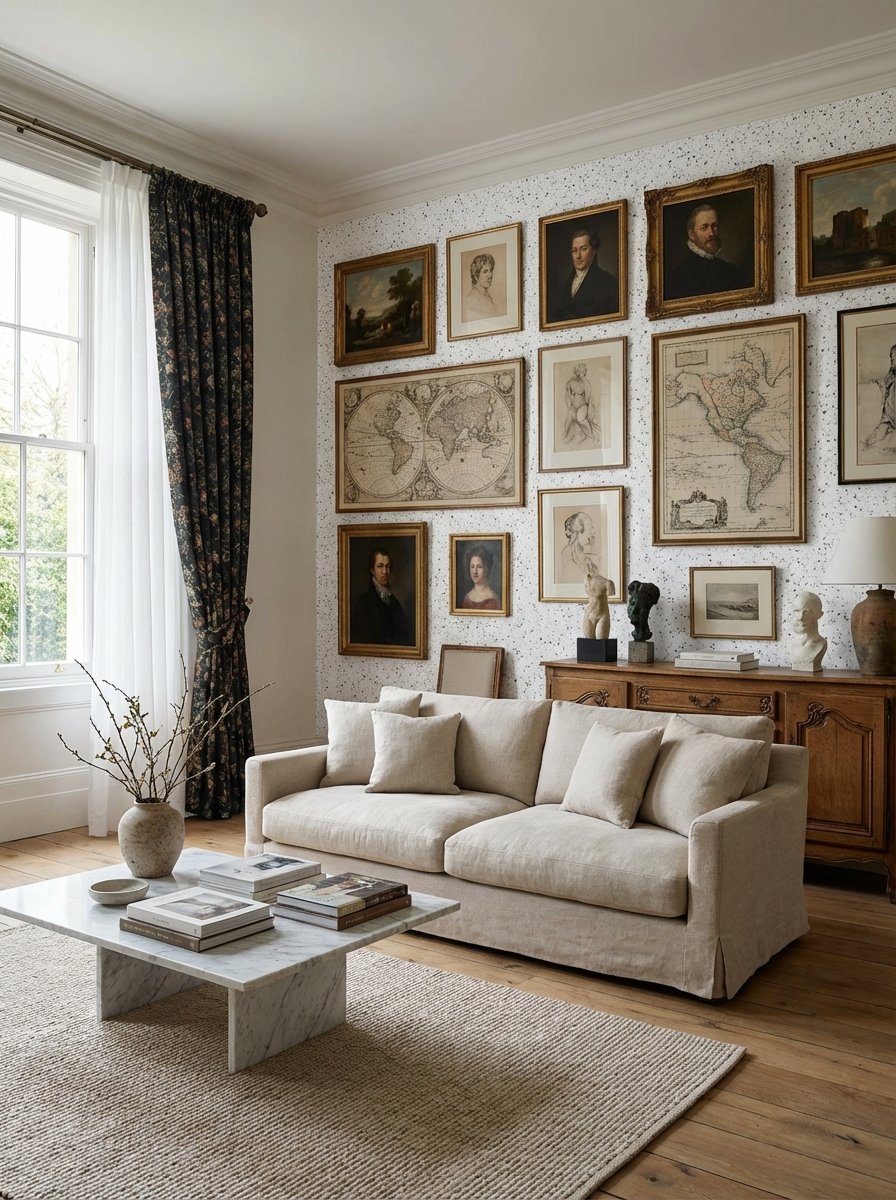
Nothing signals sophistication quite like a thoughtfully curated art collection. The good news? You don’t need original Picassos to achieve gallery-worthy walls. The secret lies in curation, framing, and presentation. Museum-quality print sets in coordinating frames create instant cohesion, offering the collected-over-time look without the decades of hunting. Choose pieces with complementary color palettes but varying subjects and styles—too much matching reads as hotel-room generic rather than personally curated.
Scale and proportion separate amateur arrangements from professional installations. Large-format canvas art makes bold statements above sofas, beds, and dining tables—these anchor pieces should be substantial enough to command attention and balance the furniture below them. The formula: art should span two-thirds to three-quarters the width of the furniture it’s above. For gallery walls, multiple framed pieces in varied sizes create visual interest through repetition and variation. The professional trick is maintaining consistent spacing (2-3 inches between frames) and a unified element—matching frames, matting, or subject matter.
Installation height is crucial: the center of your art should sit at eye level (typically 57-60 inches from the floor). For gallery walls, maintain this center line across all pieces, adjusting individual heights to keep the overall composition balanced. Use painter’s tape to mock up arrangements on walls before committing to holes—this allows you to experiment with layouts until you find the perfect configuration. Proper lighting completes the gallery effect; picture lights or adjustable track lighting showcase your collection like a museum, emphasizing that these pieces deserve attention.
Pro Tip: The Salon-Style Spacing Secret
Professional art installers maintain 2-3 inches of consistent spacing between all frames in gallery walls, creating visual rhythm and cohesion. Use a spacer (even a book works) to maintain this distance as you hang. This uniformity prevents walls from looking chaotic or randomly assembled, achieving that curated-collection aesthetic seen in high-end homes and galleries.
Frequently Asked Questions & Expert Tips
How much should I budget for these luxury upgrades? Prioritization is key. Start with high-impact, visible changes like statement lighting and hardware swaps (typically $200-500 per room), then layer in architectural details like crown molding ($300-1000 depending on room size) as budget allows. The beauty of these upgrades is they’re modular—you can tackle one room at a time, building luxury incrementally.
Can I DIY these upgrades, or do I need professionals? Most of these projects are surprisingly DIY-friendly. Hardware swaps, peel-and-stick wall treatments, curtain hanging, and art installation require only basic tools and patience. Crown molding, built-ins, and coffered ceilings need more skill but are achievable with research and careful measurement. Reserve professionals for electrical work (hard-wired lighting) and anything structural that might affect your home’s integrity.
What’s the biggest mistake people make with luxury upgrades? Going too small. Undersized light fixtures, skinny curtain panels, tiny art pieces, and minimal crown molding all read as cheap rather than sophisticated. Luxury spaces embrace substantial, confident scale. When in doubt, size up—your room can handle more visual weight than you think.
How do I maintain cohesion across different rooms? Choose a consistent finish family (all warm metals or all cool metals, for example) and repeat it throughout connected spaces. This doesn’t mean everything matches exactly—variation within a family (brushed brass, polished brass, antique brass) adds interest while maintaining visual flow. Architectural elements like crown molding and baseboards should be consistent throughout your home for a unified, custom-built feel.
Which upgrade provides the best return on investment? Hardware swaps and lighting updates offer the highest impact-to-cost ratio, transforming spaces for hundreds rather than thousands. Crown molding and built-ins provide the best actual ROI when selling, as they’re permanent architectural improvements that justify higher asking prices. Stone and textile upgrades enhance daily living experience and photographic appeal, making your home more marketable if you choose to sell.
Your Million-Dollar Transformation Starts Now
Creating a luxury aesthetic isn’t about spending indiscriminately—it’s about making strategic choices that compound into something extraordinary. Each upgrade we’ve covered works independently, but together, they create a synergistic effect that transforms your home from nice to “wait, how much did you spend on this place?” The beauty is in the layering: architectural details provide the foundation, quality materials and finishes add richness, and thoughtful styling brings personality.
Start with the changes that excite you most, whether that’s the instant gratification of new hardware or the dramatic transformation of a coffered ceiling. Document your progress with photos—you’ll be amazed how quickly these individual upgrades coalesce into a cohesive, high-end aesthetic. Remember, luxury homes aren’t built overnight; they’re curated thoughtfully, one considered detail at a time. Your journey toward a multi-million-dollar look begins with that first strategic upgrade. Which room will you transform first?